

Bulk Re-enable Google Chrome OS Devices with GW Manager
Welcome to GW Manager. In this video I'll show you how you can easily re-enable Google Chrome OS devices with GW Manager (just to get terminology out of way, re-enable is same as enabling a disabled Chrome OS device, or re-provisioning your de-provisioned device.
Now, to start with, If I go to my Google Workspace Admin console, I see that I only have Chrome device enrolled and it is disabled status.
This device is assigned to our test user, We will re-enable this device with GW Manager.
This is our test account, so we only have device here, but rest assured, GW Manager can handle even over 100,000 devices in one go very easily.

To do that, let us first launch GW Manager Google Sheet extension.
For that, I will go to extensions, then I'll go to GW Manager and click on launch.
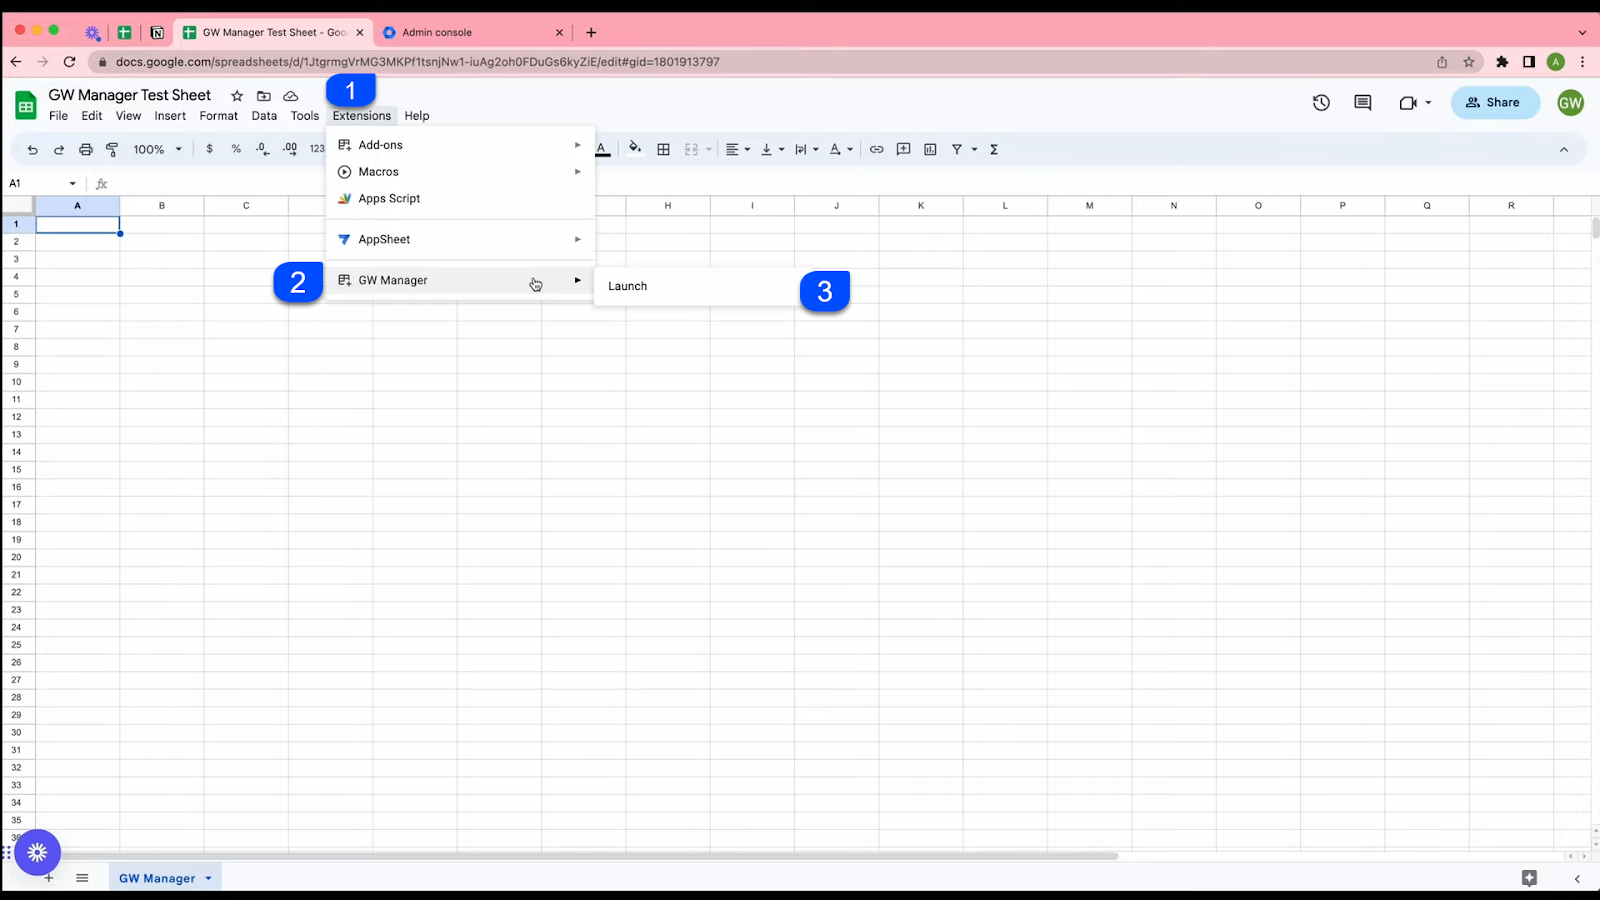
If you did not see GW Manager here, please watch the installation video on our website here gwmanager.com .
Once the extension is loaded, you will click on choose a feature and then select Manage Chrome OS devices.
Now once you're here, the first function is Chrome OS device actions, So let's keep this.
GW Manager recognizes that we don't have the action sheet inserted yet and it is asking us to do that.
So lets click on execute and it will insert the sheet which will help us run re-enable action.

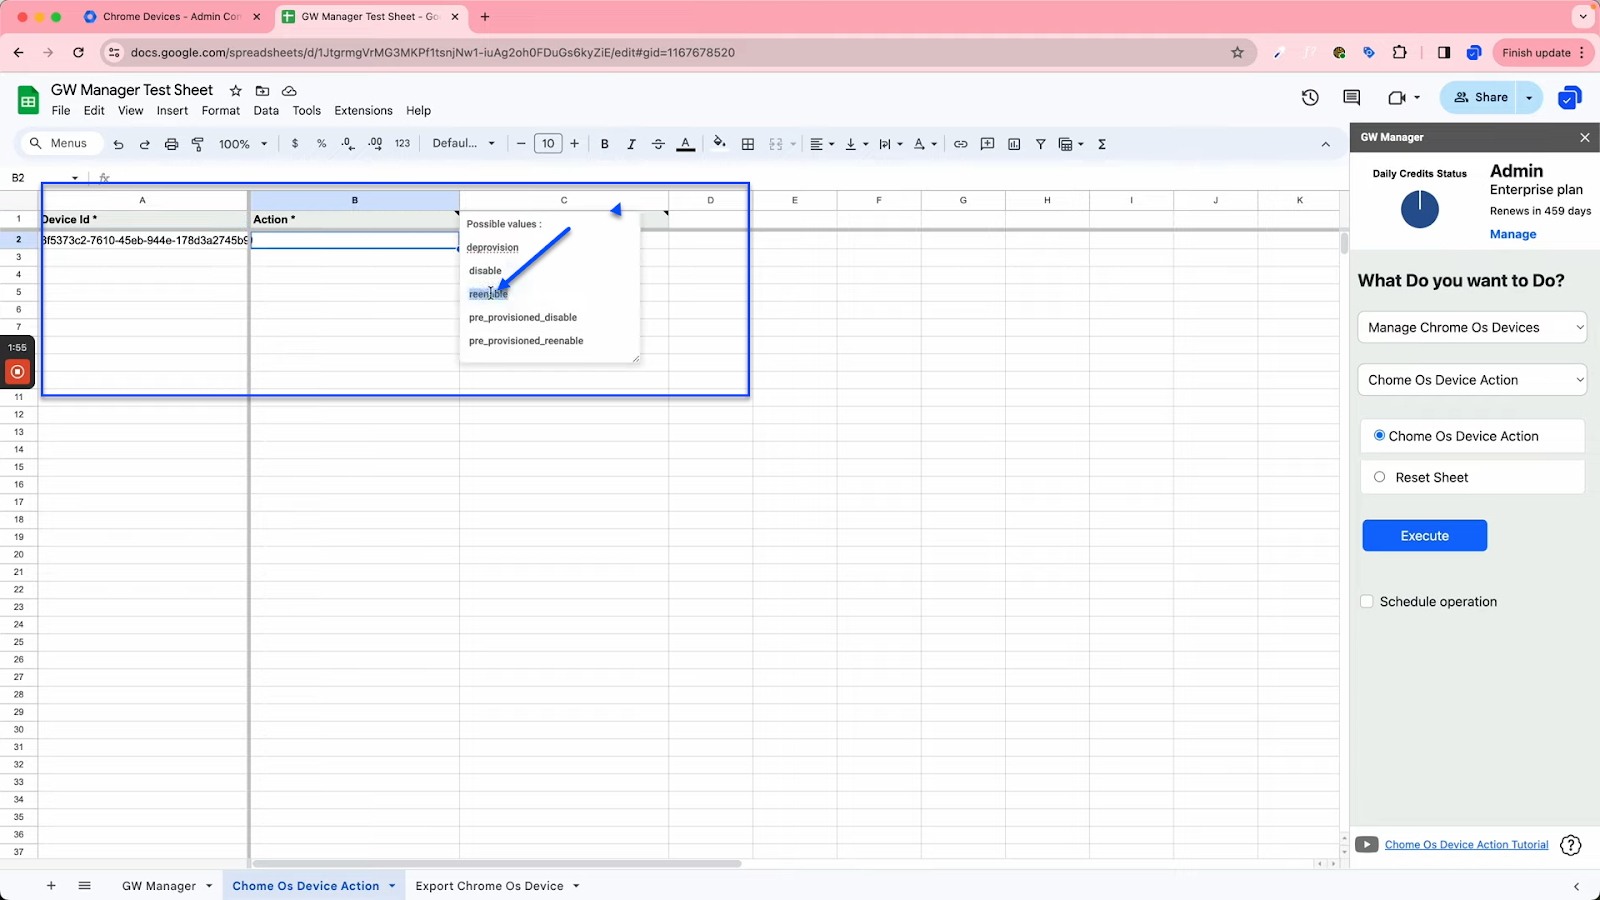
As the sheet is now inserted, We need to fill up the required information here (required information is denoted with asterisk).
You can also hover on the columns to see possible values for the action.
So we now need to provide Device ID in column A, and reenable (as action) in Column B, but do not worry, there is a way to export a list (report, csv) file for Chromebook devices with device id, asset and serial number.
You can do this by using Export Chrome OS Devices in bulk function in GW Manager, This will list all your Chrome OS devices, with way you can easily find Chrome OS device ids as the first column of this export outputs it, so you can copy that for the respective device ids and paste them here.
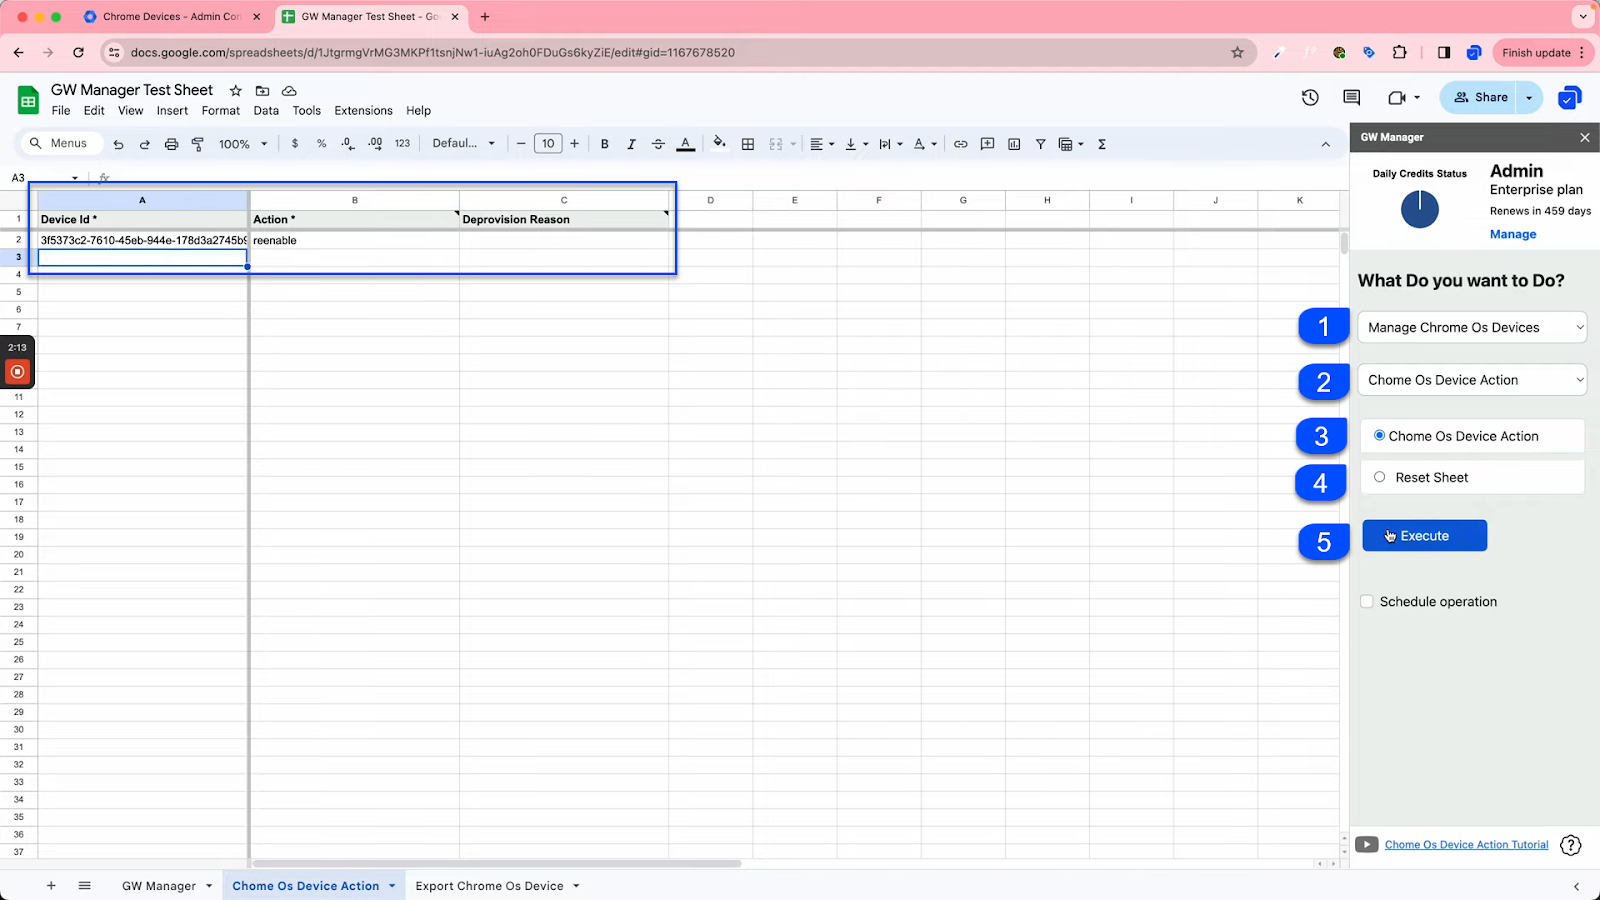
Now your action should be reenable because we are re-enabling the device.
By hovering on the column, I see that de-provisioning reason is only required in case of de-provisioning devices, but we are re-enabling them, so you can leave this column empty.
Now once we have entered the required details in the sheet, and run the Chrome OS Device Action function by clicking on Execute.
We are expecting these devices to be re-enabled after GW Manager completes this bulk task.
In just a few seconds (may vary if you are re-enabling lots of devices) GW manager has completed the update task, and highlighted the job's status as 'Action Successfully Performed'.

Now, we can confirm this by visiting Devices section in Google Workspace Admin Console.
We can see here that GW Manager has re-enabled the given devices (Google shows the device status as 'Provisioned' after they are re-enabled).
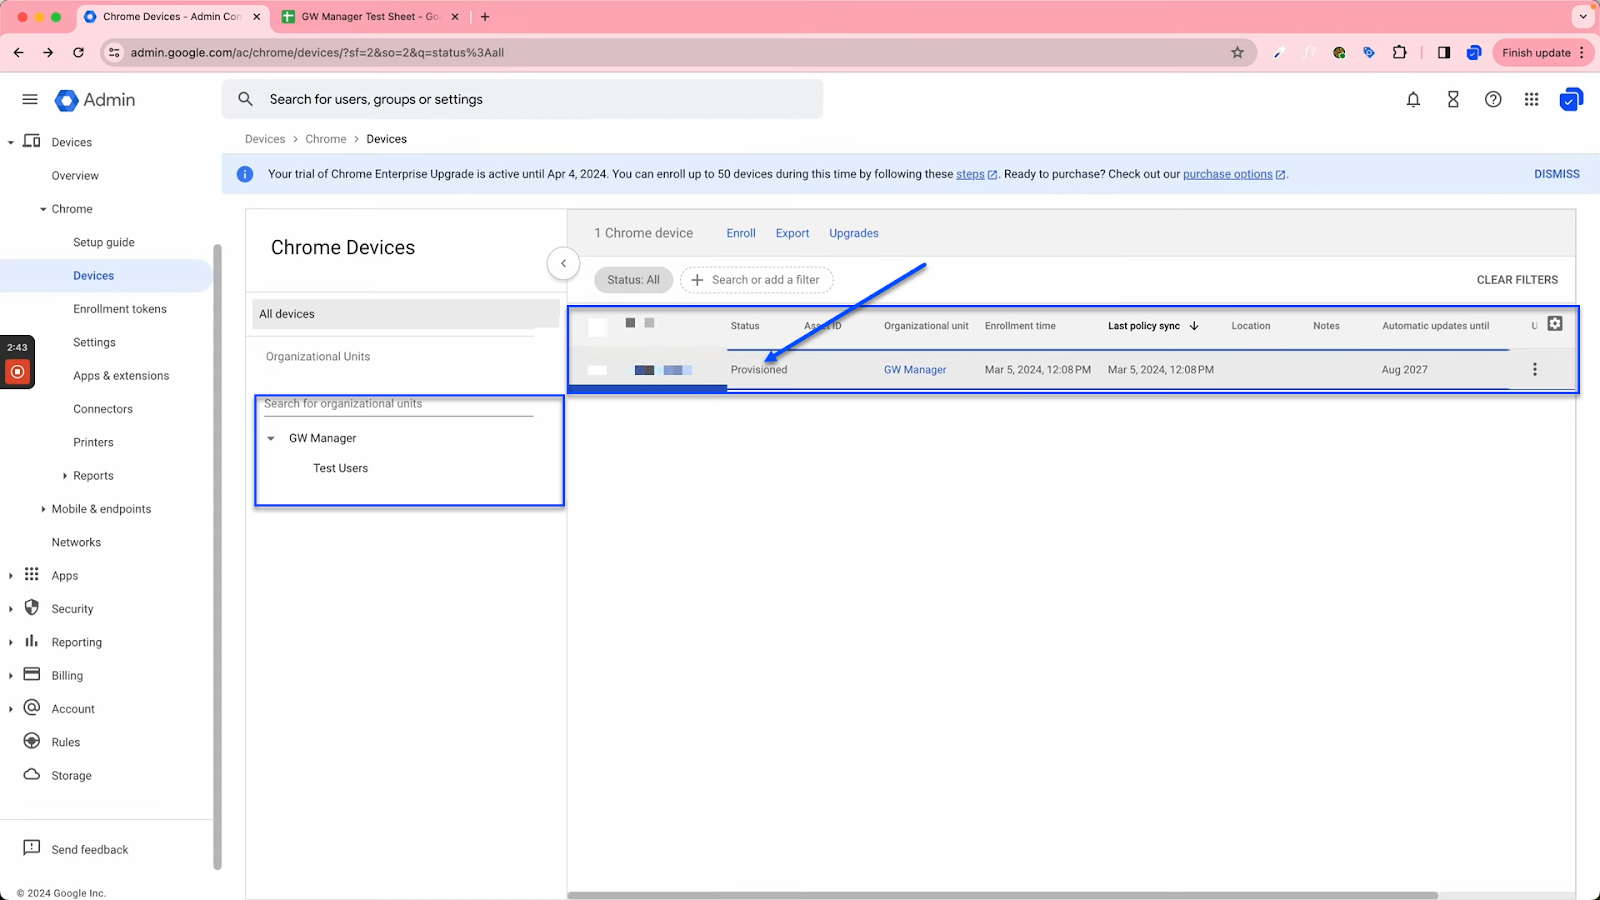
This is how you can bulk re-enable Google Chrome OS devices with GW Manager.
You can do much more with GW Manager and we are constantly adding new features based on customers' requests.
For more information please visit our website gwmanager.com thank you so much for reading.
Related Posts
Use GW Manager like a pro with these step by step tutorials, and save bunch of time doing bulk tasks in Google Workspace!


