Easily Change Organization Units for Multiple Chrome OS Devices Using GW Manager
Welcome to GW Manager.
In this video, I'll show you how to bulk move your Google Chrome OS devices with GW Manager to different organization units in Google Workspace.
First, let us launch GW Manager google sheet add-on. For that, we will go to extensions, then click on GW Manager, and click on launch.
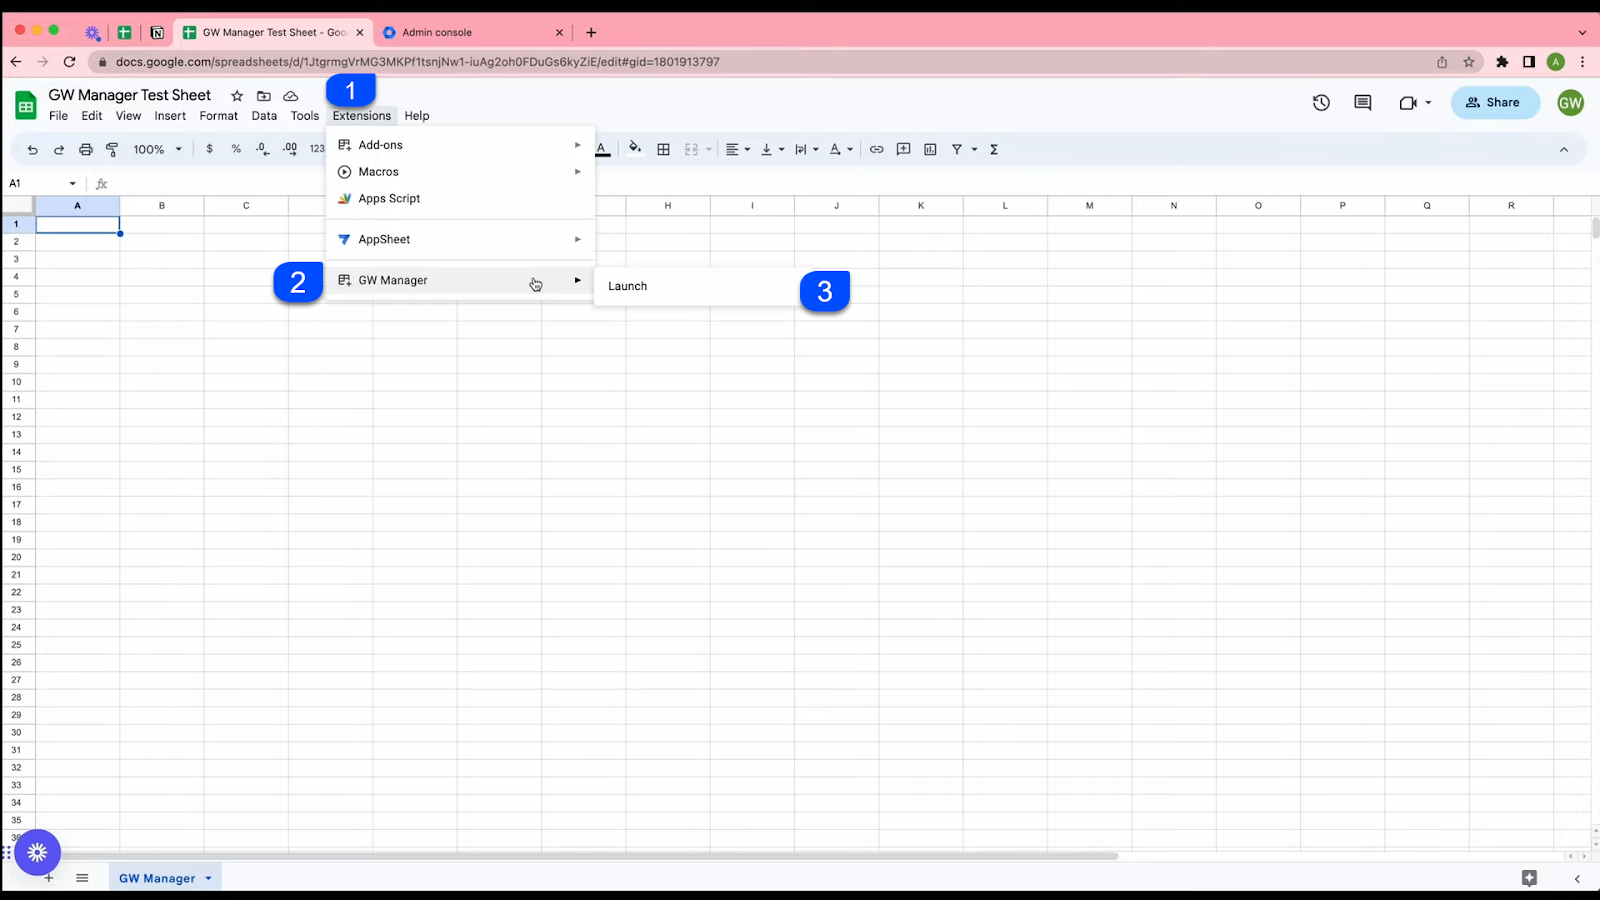
If you do not see GW Manager here, please watch our add-on installation video to learn more about installation process.
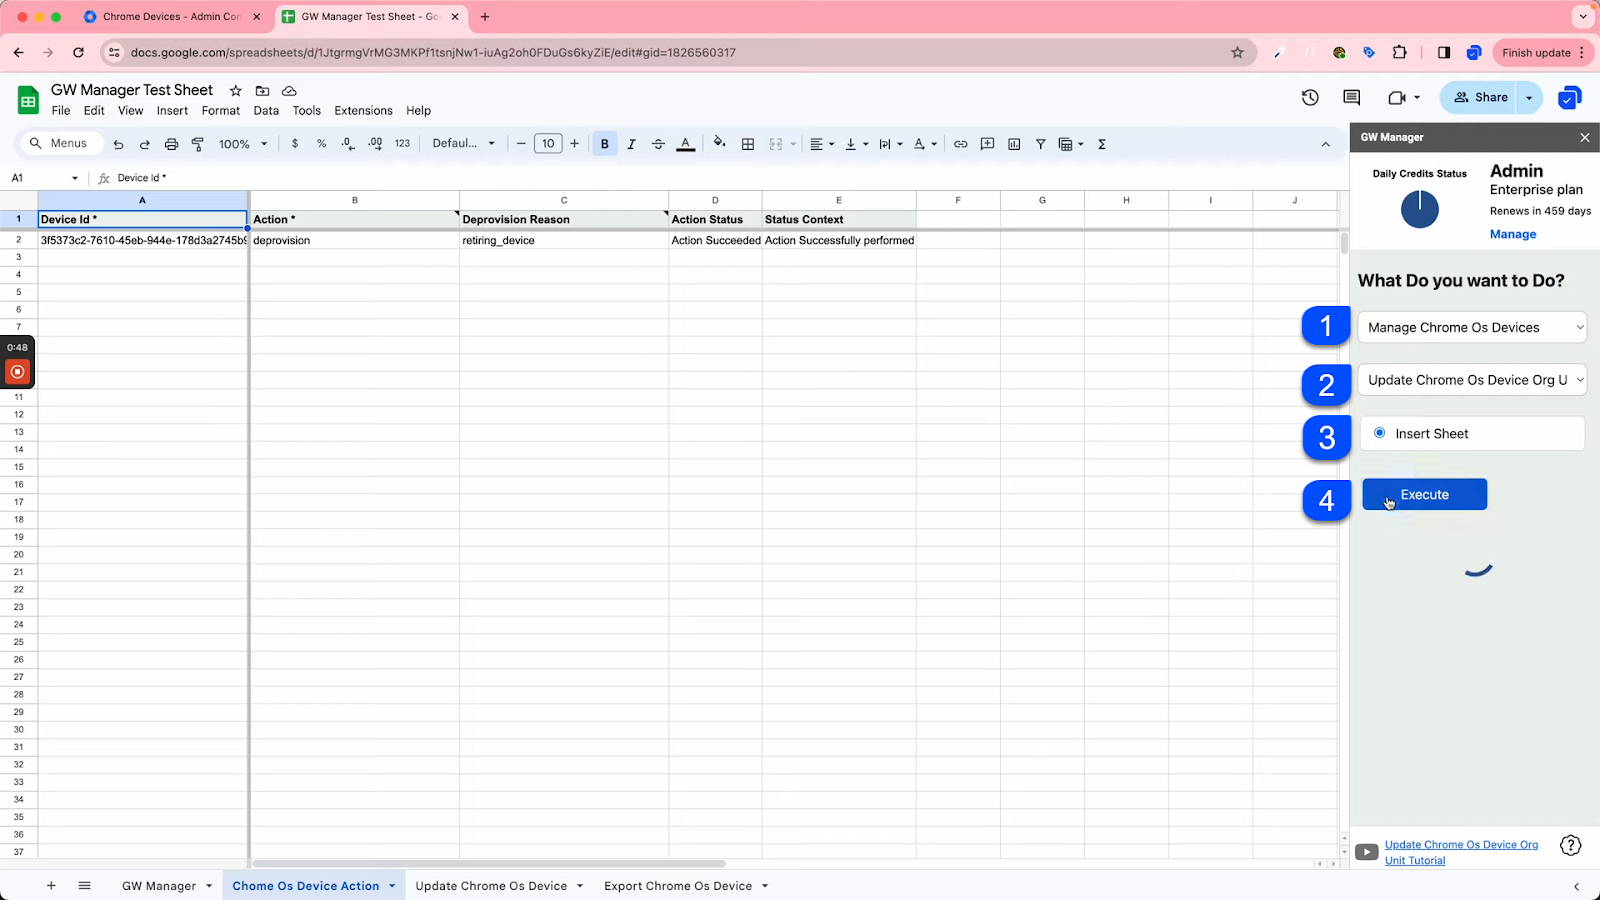
Once the add-on loads, you will choose Manage Chrome OS devices feature from the features list, under this, you will choose Update Chrome OS Devices Org Unit.
GW Manager recognizes that we don't have the sheet inserted yet for this update. It is asking us to execute and insert that sheet, so let's do that.
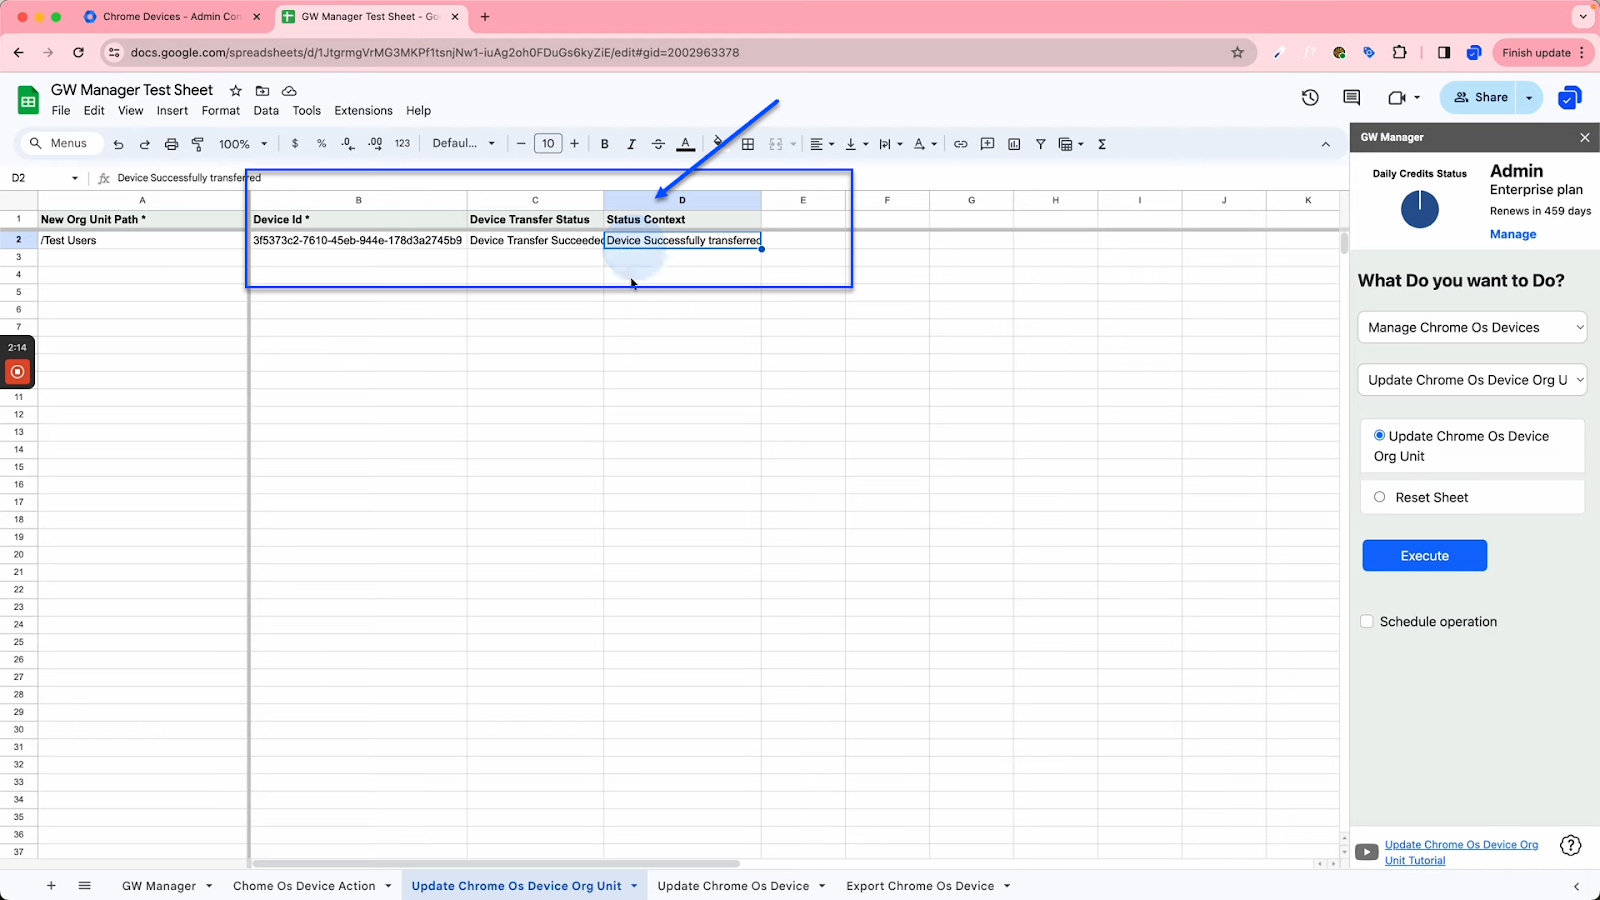
In the inserted sheet, it is asking for two things, new org -Unit path and the device ID.
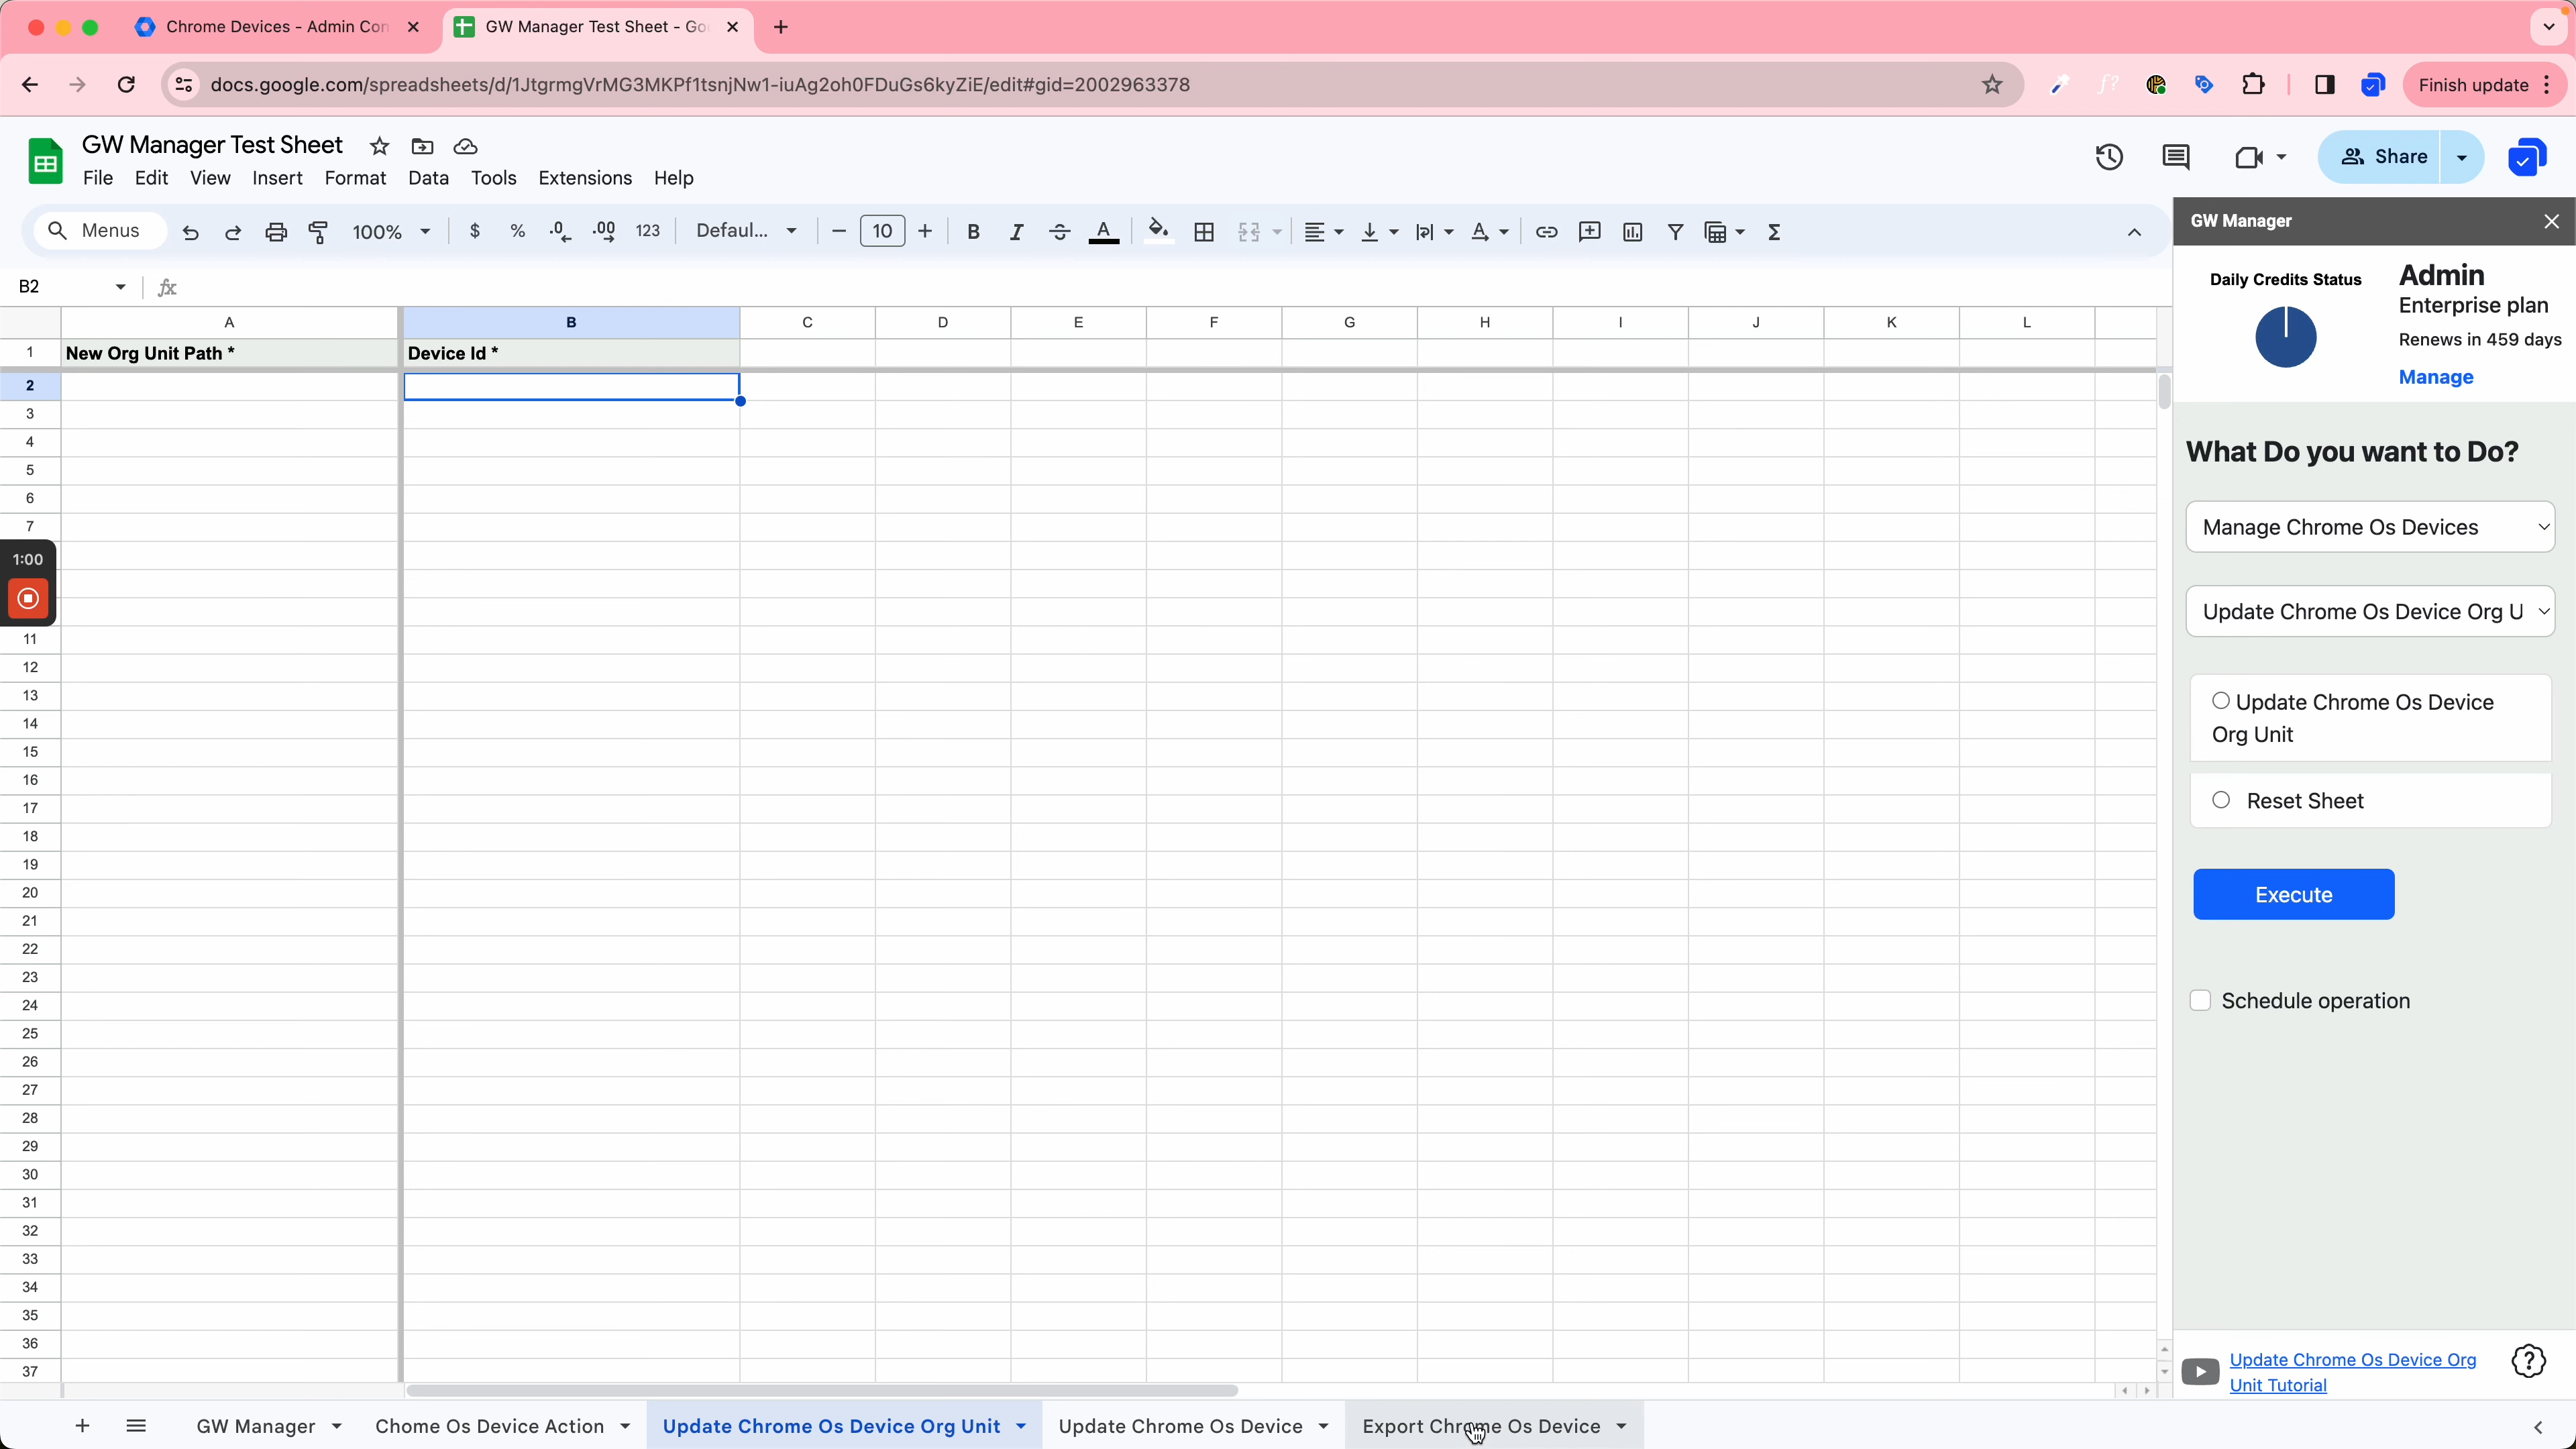
You can use our export Google Chrome OS device list feature which will give you the device ID of all your devices in column A (it also lists other attributes including asset and serial number if you need them for some reason).
You can then copy the device IDs of the devices that you want to move to different organizational units and put them here.
We only have one Chrome device here to test, but rest assured it would work fine even if you put 100,000 devices at once (thanks to scalable tech stack running in Google Cloud).
We will add the device path, which should be written as / (for root) or /childorgunitname (for sub-orgs). In our case we want to move the devices to our Test Users child org, so we will write it as /Test Users
You can also use the export orgUnits function in GW Manager, which will export all organization units in your Google Workspace including the orgUnit path, so you can confirm or copy paste the orgUnit path from there to here.

After providing the required information to move devices to the new organization unit, click on execute to run the function.
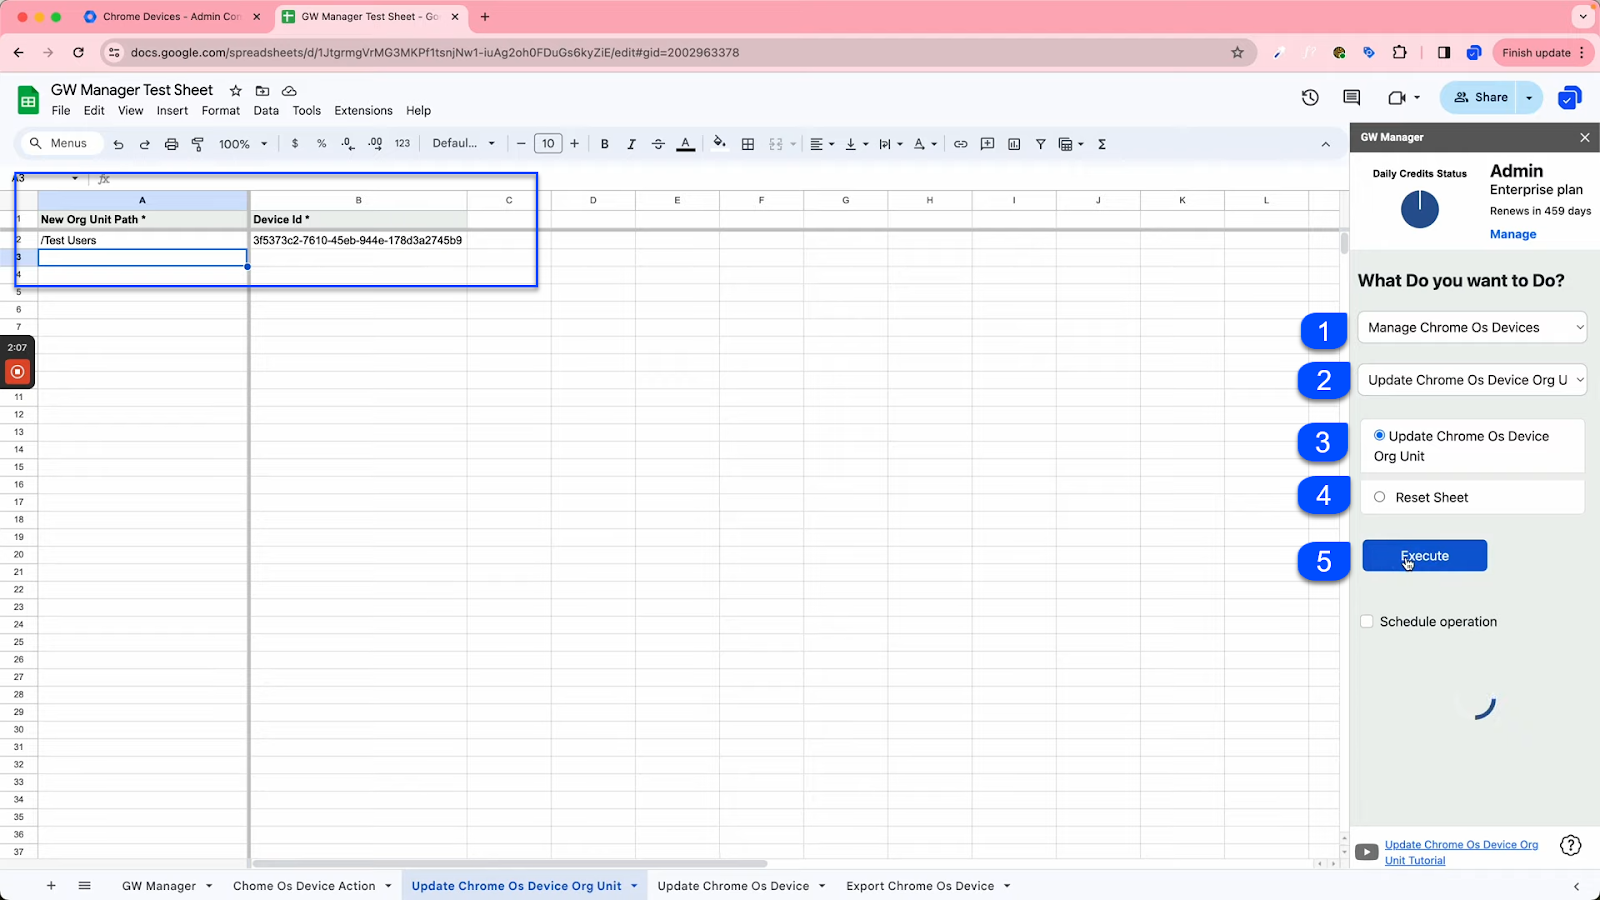
Depending on the number of devices you are moving, it may take a few seconds to a few minutes for GW Manager to complete the task, and write the status in the Status field.
As we see it has successfully moved the given devices.
Now to confirm the devices’ movement, let's go to Google Workspace Admin Console, do a quick refresh to see if that's the case.
GW Manager has indeed moved these Chrome OS devices successfully to the given new organization unit.

This is how you can bulk move organizational units for your Chrome devices with GW Manager. You can do much more with GW Manager, and we are constantly adding new features based on customers' requests and feedback.
Please visit our website gwmanager.com to learn more.
Thank you for reading
Related Posts
Use GW Manager like a pro with these step by step tutorials, and save bunch of time doing bulk tasks in Google Workspace!


